Showing posts with label DIY. Show all posts

Wednesday, August 21, 2013

Newly discovered washi love - one (or many) DIY idea(s)

This keeping the schedule thing is pretty hard when you have a husband like mine... We've been married for almost 3 years and we are still working on a balance between my schedule freak atitude and his oh so spontaneous ideas. 

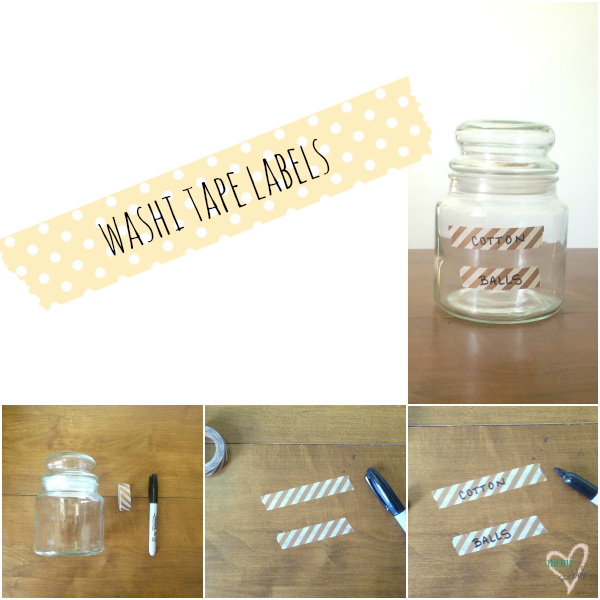
I wanted to share with you last week how to do washi tape labels. I guess later is better than never, right? It's an easy idea of diy ( it takes literally 2 minutes to do it). All you need is a cleaned glass jar, some washi tape and a sharpie (can be a black one or coordinated). I used whatever I had in hand and it came out unexpectedly pretty. Your imagination is the limit. 


How to do it? Take 1 (2 or how many you'll need) strip(s) of washi tape, write whatever you need with the sharpie, stick it on your glass jar. That's it. Now comes the fun part: where will you use your creative labels? To make some cute happy mail for a pen pal? For labeling glasses at a party? For some pretty organizing storage? I want to see/hear all your pretty ideas!


 So you read my post and suddenly fell in love with washi tape, but it's late, none of the closest craft stores are opened and you really want to use it now. In that case, or any other case that might be, here's a tutorial how to make your own washi tape. Pretty sweet, isn't it?

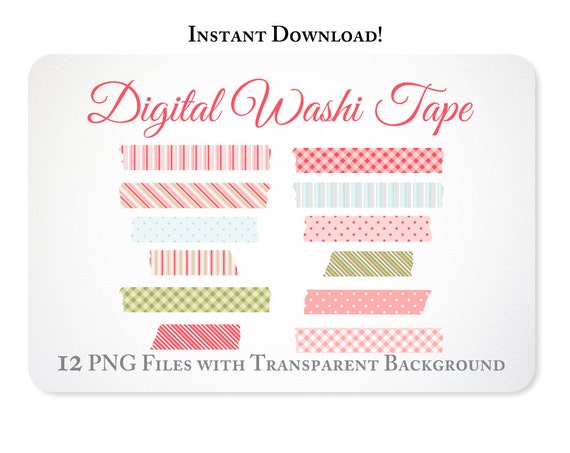
Update:  My apologies for totally forgetting to mention here the crazy awesome digital washi tape from a vegas girl at heart that I used in my photo above. Yes, there are very talented people out there who make these available for us:
via

via

Friday, July 19, 2013

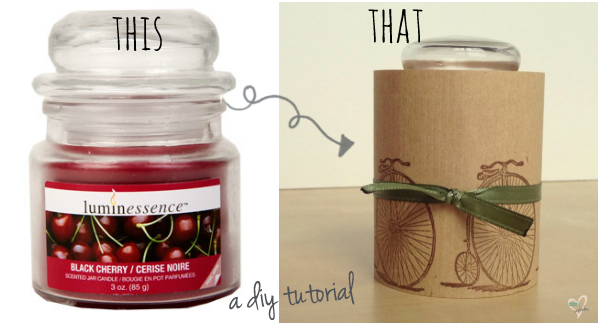
this to that: a short and sweet DIY


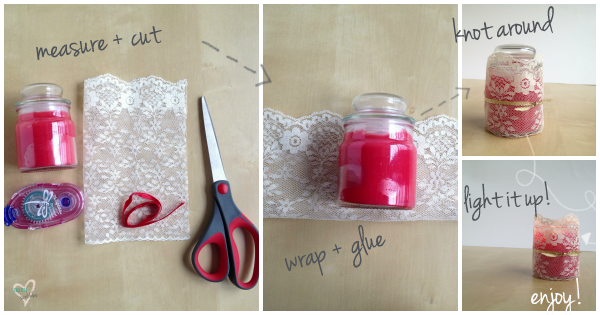
Remember that post I wrote back in April about decorating on a budget? Well, here's a quick tutorial how I made those candles. Believe me when I say it's easy, quick and cheap(my favorite combination)! 
Now, I know the initial candle had the brown leaves stamped on it, on this tutorial I used a bicycle stamp, because I couldn't find any of my leaf stamps...:) 


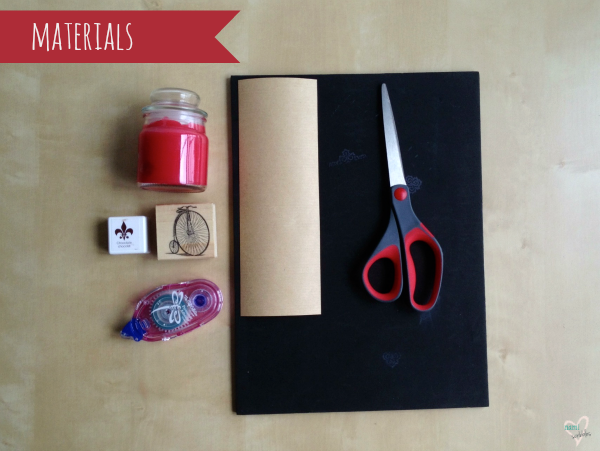
You will need:
- dollar store jar candle in your fav scent (I saw them at Michaells, too);
- brown bag paper(I didn't try it, but I think tissue paper might do it as well);
- stamp and ink of your choice;
- ruller and a pen;
- a pair of scissors or a craft knife;
- glue stick or double sided scotch tape or glue gun would do it too;
- 1/8 in satin ribbon (I forgot to show it in the picture).
(Photo with all required items)

Peel off the sticker from the jar. If you have troubles doing that, using a hear gun or the hair dryer, heat the sticker - it will come off very easy. 

Cut 3x8.5in piece of paper. (I suggest to measure the height and width of candle before cutting your paper to make sure your piece of paper will be the desired height and long enough to "hug" the whole jar)    Tip: don't cut the paper too high, it can easily catch on fire when the candle is lit up (I've learned it the hard way)

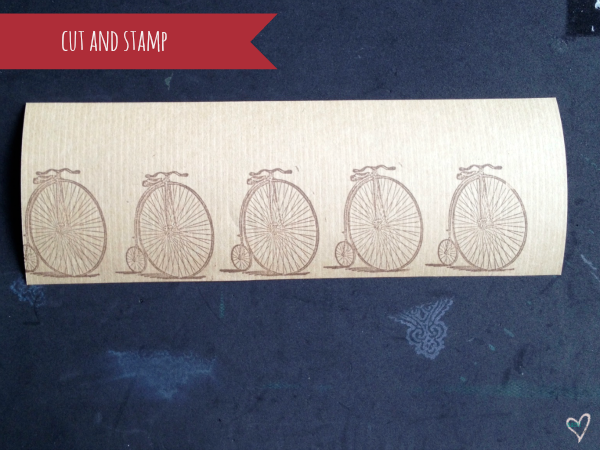
Lay the just cut piece of paper on a smooth surface (your desk) and start stamping. Your imagination is the limit. I know the candles for that event were with fall leaves, on the tutorial I used a different stamp because I couldn't find my stamp leaves. :)

The next step is the trickiest. Roll the new designed paper around the candle and glue the ends together. 

Tie the ribbon around the candle and make a knot, or a cute bow, whatever you like most. I didn't have time so I made knots.

Voila!! You just made your first fancy candle! Now go make some more!!

***

Because lately I'm loving lace, I bought a small piece of lace (for $0.75) and re-made one of my candles. It turned out cuter than I expected! To make it, you' do the same steps as above, but you'd skip the stamping.(so it's faster to make!).


I hope you, my readers, have enjoyed this little tutorial! If you do make some, let me know! And if you want to take pictures, I'd be more than happy to see them on Facebook, Instagram or whatever you are using! Just leave a comment below with a link to your photo!


Let's keep in touch


Wednesday, April 3, 2013

Decorations on a budget


Not all the time you have the time, the money, the energy to do things as you imagined. This is my story, how I made everything work out with what I had in hand at the moment. Note: this article is pretty long, so grab a coffee and make yourself comfortable.


When our friend Cosmin came back from Romania with his brand new wife, Dana, our church wanted to throw a warm party to celebrate their new life together and introduce Dana in our community. We rented a ballroom at one of the local restaurants, and I volunteered to decorate it. Everything happened on such a short notice, I didn’t even have time to go see the place. So, with that in mind, I decided to go simple, warm and use as many things I had around the house. It was the beginning of October, so I went to dollar store and bought 20 scented candles (the ones that come in a jar). That was all the money I spent!!! (I was so proud of me!!!) 


I gathered everything else that I had around the house and could’ve been used for fall theme décor: brown packaging paper for candles (you’ll see in the pictures below how they looked after the makeover), olive satin ribbon, brown basket, a white luminary, tea battery candles, brown jute and a piece of ivory card stock (leftovers from Cosmin & Dana’s wedding invitations), leaf stamps, chocolate brown ink, two old vases turned into candles supports, and another vase with some cones and white Christmas lights in it.

So we (my hubby and I) get to the restaurant 30 minutes before everybody arrives. Eddie starts working on the sound system, I start decorating. There were 2 very long tables, one round table for Cosmin and Dana and another table right at the entrance. I placed the scented candles along those two long tables. (Sorry, I didn’t get a chance to take a picture before everyone arrived).


On the round table, I placed the white luminary with a tea battery candle in it, the old vases turned into candles supports, and some candles. It looked kind of empty, but I was lucky someone brought some flowers and they fit perfectly! 


I used the table at the entrance as “welcome table” and the “cards & gifts table”. I knew before there will be people who will give cards, so I used the ivory card stock to make a CARDS sign. I hanged it on the brown basket with the brown jute. Also, I scattered the left battery candles and one of the scented candle.

Then, I took a deep breath!!.. Phew!!! I was done! It was cute! (even though the lighting was terrible). We made new friends, had fun and most important thing, we celebrated them. their love. and new beginning.


What do you do to stay on the budget when decorating?


We can keep in touch: